Using Egan Parametric Graphic Scale Application
Once you install the app, it works in the background with very little need for input from the user. However, you may need to change some of the default settings, and customize the graphics to suit your company.
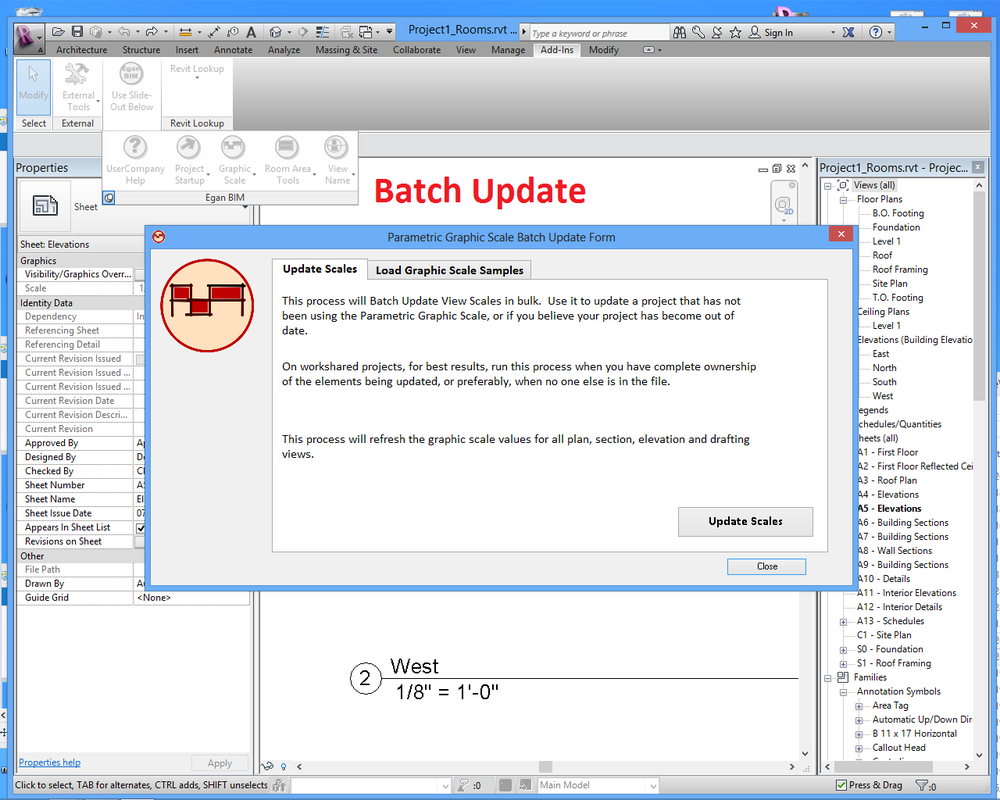
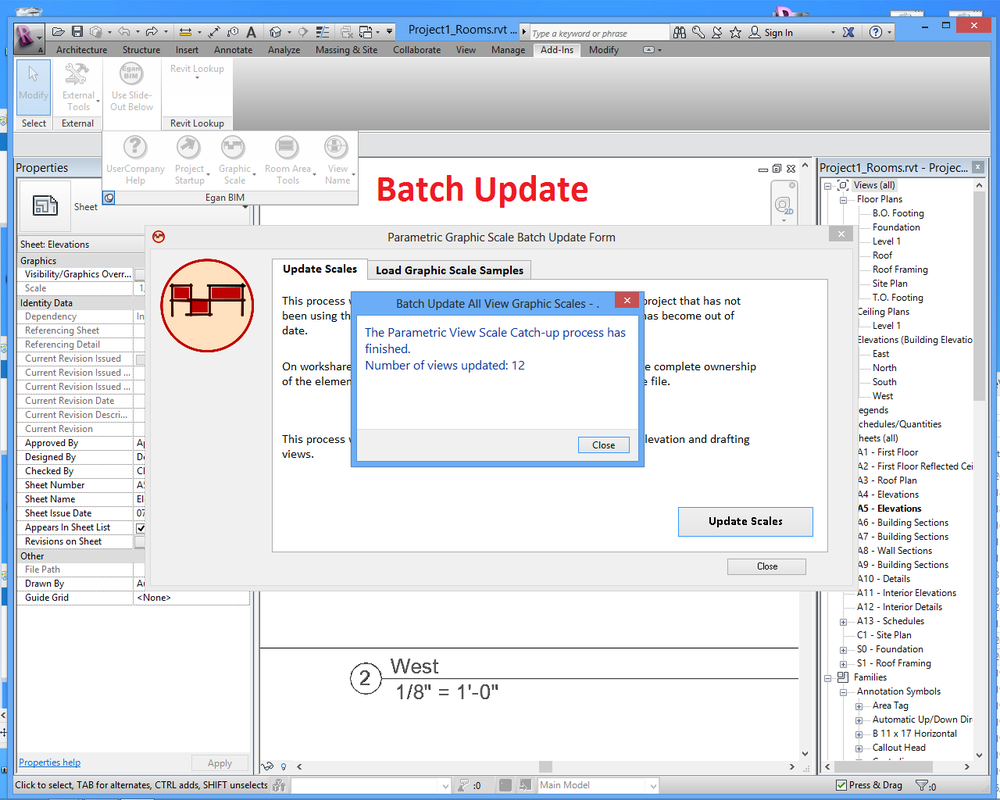
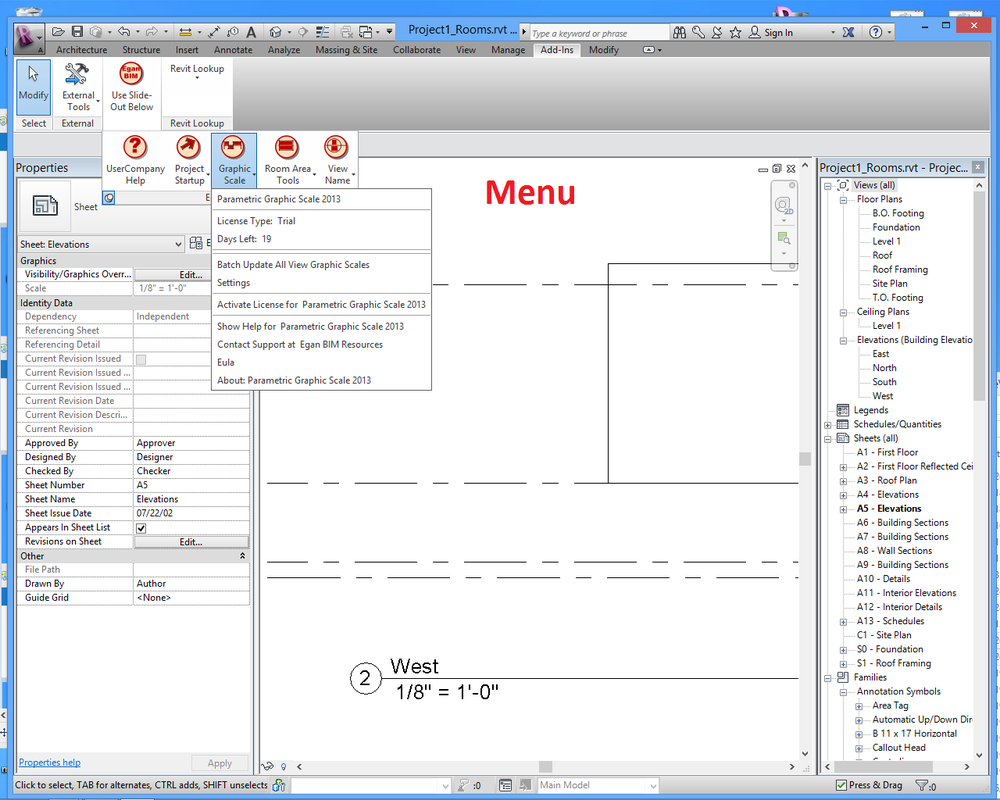
In Revit®, go to the “Add-ins” tab > and the “Egan BIM Resources” panel. Select the slide-out menu at the bottom of the panel to display the “Parametric Graphic Scale” menu. Select “Batch Update All View Graphic Scales” to display the Batch Update form.
If this is your first project using the Parametric Graphic Scale, select the “Update Scales” tab, and then click the “Update Generic Annotation Scales” or “Update View Title Scales” button, as appropriate, to perform a batch update for all views in the project. To load samples into your project, do not close this form.
The app contains three different graphic scale samples.
View Title – Static Graphics
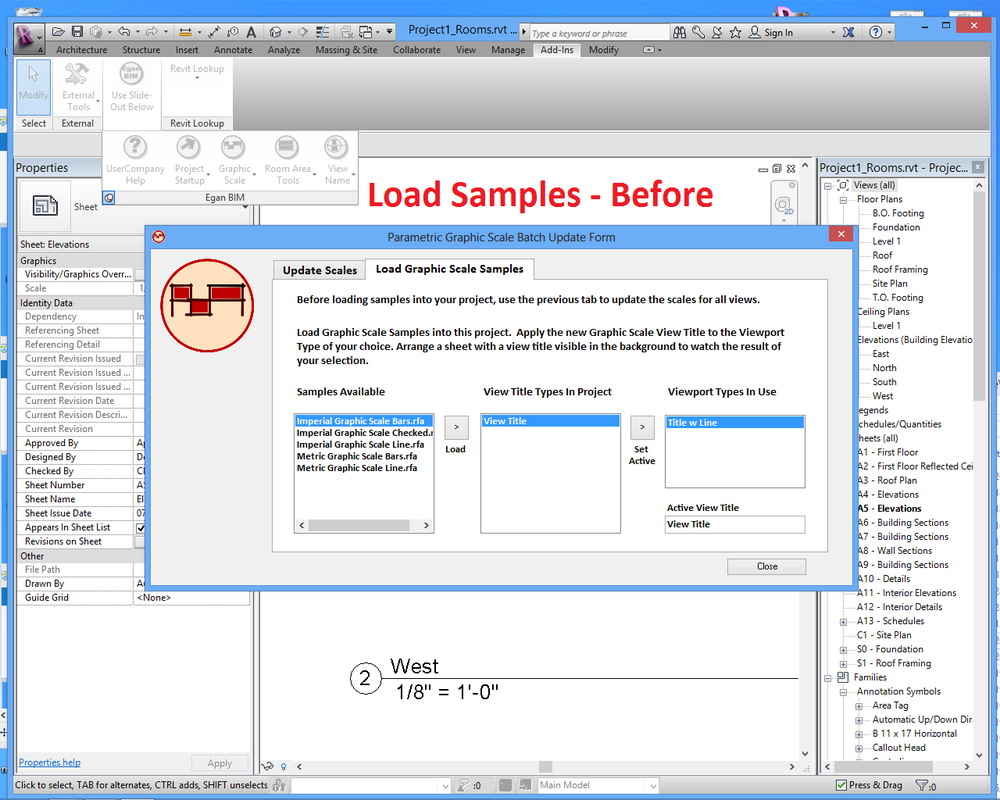
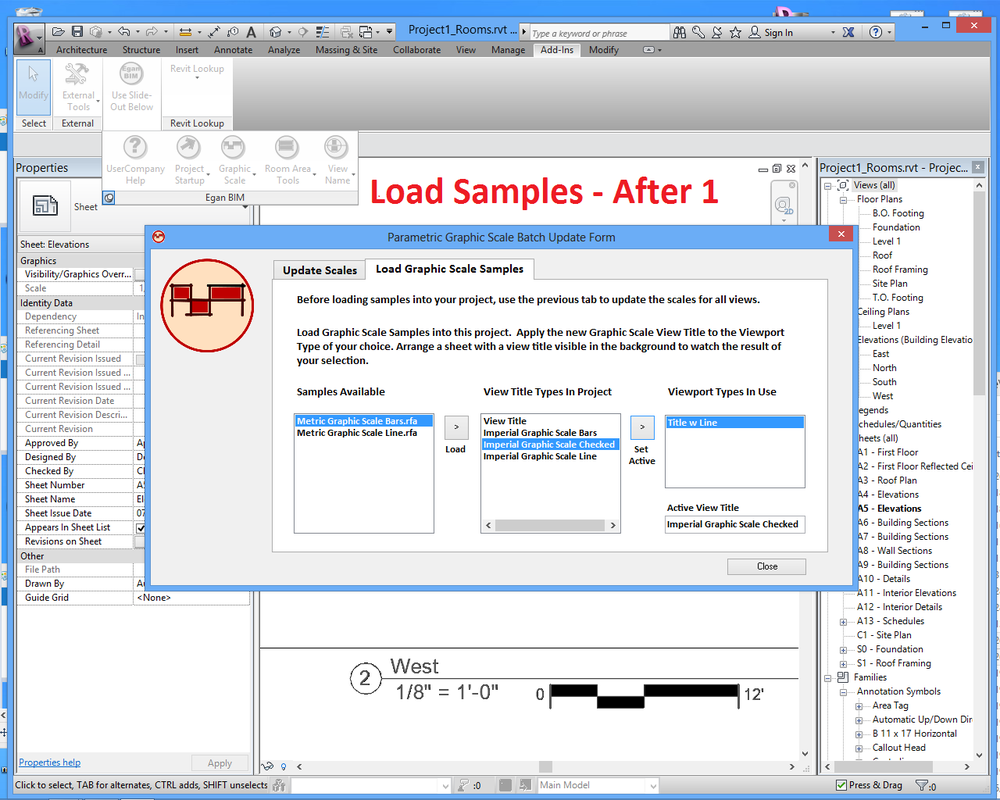
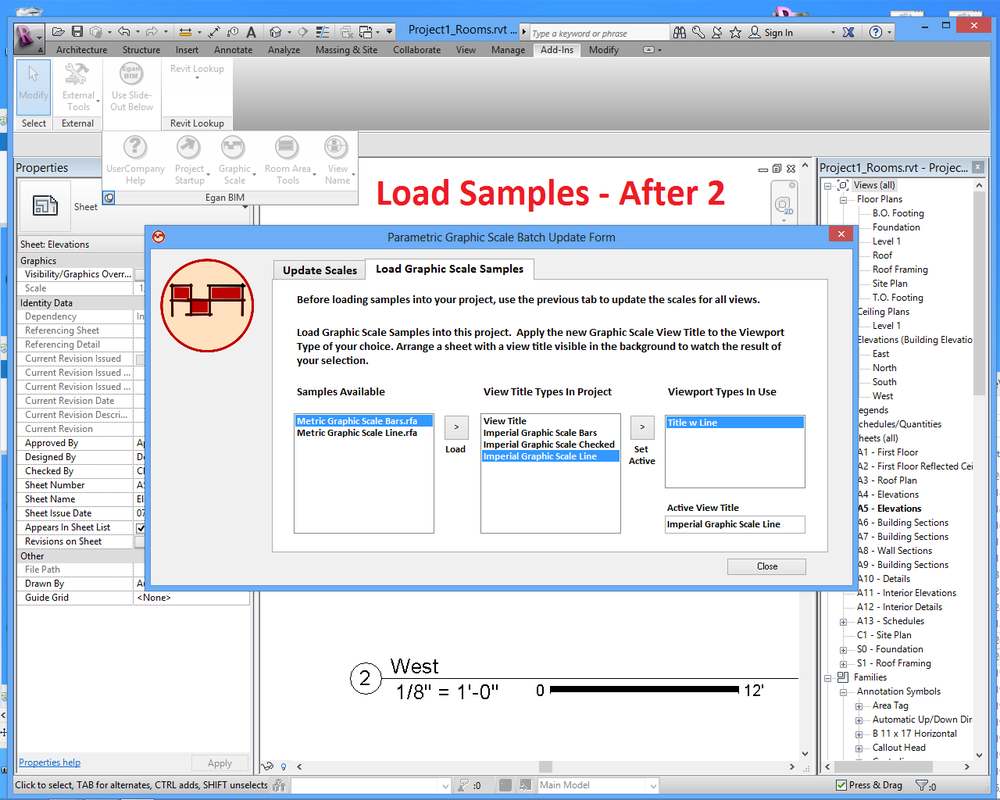
Select the “Load Graphic Scale Samples” tab. If possible, position a sheet with a view title visible in the background for this process. (See the screen shots below.) From the “Samples Available” box on the left, load samples into the project as desired. Find your loaded sample in the “View Title Types in Project” box and use the “Set Active” button to display the sample view title.
View Title – Swapping Graphics
Make sure there is at least one Viewport type in use (at least one 2d view on a sheet) before you begin. Click on the "Load Swapping View Title Sample" tab. Make sure you have a Viewport type visible and selected, then click on the "Set Up Swapping Graphic Scale" button.
Generic Annotation
Click on the “Load Generic Annotation Samples” tab. In the box, “Generic Annotation Samples Available,” select the desired family, and then click the button, “Load Generic Annotation Family” to load the family in your project.
Once you have updated the scales and loaded the desired samples, close the Batch Update Form.
Graphic Scales for Titleblocks
To review the behavior of the Graphic Scales for Titleblocks, use the Graphic Scale menu to "Open Sample Project - Titleblock" with either Imperial or Metric settings, as required. Follow the suggestions shown on the sample sheet to change the scale and/or add or remove views.
The Graphic Scales for Titleblocks is optional. If you want to take advantage of the Graphic Scales for Titleblocks, add the Graphic Scale elements to your Titleblock family. If not, do nothing.
Using the Graphic Scale
To use a View Title based Graphic Scale, assign the appropriate View Title type to a Viewport on the sheet. To use a Generic Annotation based Graphic Scale, use the “Symbol” tool to place the desired annotation on a view, not on the sheet.
At this point you may to use the Revit® family editor to modify the sample families in whatever manner you choose. If you want to use the shared parameters in your own view titles, the best way is this: Open both your view title and a sample view title. Copy the graphic scale labels from the sample and paste into your view title. Make backups and save your work regularly- adding parameters in view titles can be tricky. Save your view title family and load into your project.
If you are using Imperial Project Units, and the Static View Title, there are no additional settings.
If you are using Imperial Project Units, and the Swapping View Title or the Generic Annotation scale, there are additional settings. On the Graphic Scale menu, select “Settings,” then select the “Generic Annotation” tab. This page contains settings, applying to both the Swapping View Title and Generic Annotation version which you can use to customize you Graphic Scale as desired.
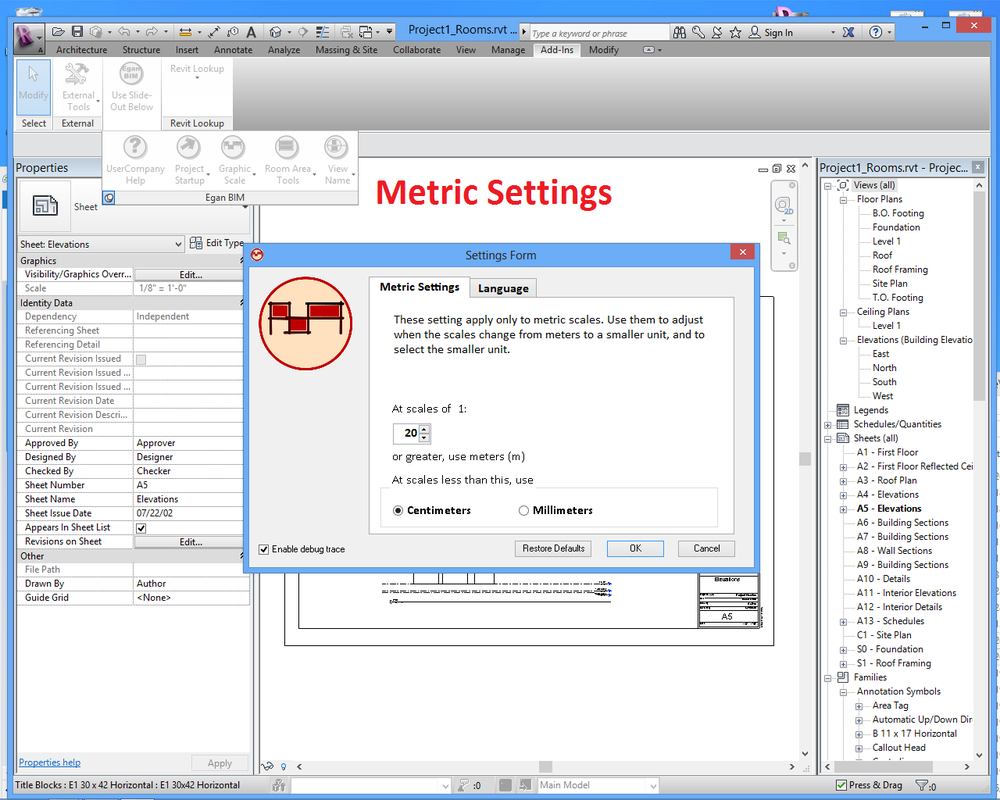
If you are using Metric Project Units, there are a few additional settings. On the Graphic Scale menu, select “Settings,” then select the “Metric Settings” tab. See screen shot below. This page allows you decide at which scale you want to convert from meters to a smaller unit – and allows you to choose whether you want the smaller unit to be centimeters or millimeters.
Additional note for Metric Units users
If you are using metric units, follow the instructions above to edit your View title family as required. Ignore the following notes.
Additional note for Generic Annotation Graphic Scale
Only one Generic Annotation Graphic Scale is accommodated per project and is set up as shown on the "Other" tab of the Settings Form. To use the sample file supplied with the application, use the default settings. If you wish to change the family and/or type names of the scale, you must enter them in the appropriate boxes on the "Other" tab.
Additional notes for Swapping View Tile Graphic Scale
The Swapping View Tile Graphic Scale uses 2 different scale displays, as defined below:
1 scales <> Used by scales that start with a 1 like 1", 1/8" 1/30", 1/16", 1/8" 1" and 6." 1 scales use a graphic depiction that is 2" wide.
3 scales <> Used by scales that start with a 3, like 3/32", 3/4", 1 1/2" and 3." 3 scales use a graphic depiction 2- 1/4" wide.
Each project can have an unlimited number of swapping View Tile Graphic Scales, provided these rules are followed:
<>Each pair of swapping view titles must be in the same family.
<>Within each family, there must be two types, "GS Type 1" and "GS Type 3."
<>The visibility for the different scales must be controlled by the types.
<>There must be one and only one of each swapping view title pair assigned to a Viewport type. The names of the Viewport types do not need to match, but should be readily understandable, like “Viewport with scale 1” and “Viewport with scale 3.”
Open and inspect the sample family that is shipped with the application, “NCS Graphic Scale.rfa” to gain an understanding of the requirements.
Your family browser will look something like this:
+- Presentation View Title
- GS Type 1
- GS Type 3
+-CD View Title
- GS Type 1
- GS Type 3
When the scale of a viewport is changed, the app will change the display values of the scale, then change the Viewport’s View Title type to “GS Type 1” or “GS Type 3,” whichever is appropriate.
Please note that “GS Type 1" and "GS Type 3" are space and case sensitive.
How “3 scales” are defined
If it is necessary to change which scales are defined as “1 scales” and which are defined as “3 scales,” go to the "Other" tab of the Settings Form and inspect the box titled “Scales of non-standard scales that start with '3.'” The scale factors of the “3 scales” are shown, separated by commas. The default “3 scale” values are 4,8,16,32,64,128,256. All other scales are “1 scales.”
Additional note on National CAD Standard scale values
The NCS graphic scale system contains some irregularities, like showing 1/2' instead of 6” or missing values in places. This app has incorporated these irregularities into its scale value processing. However, if you want to remove these irregularities, go to the "Other" tab of the Settings Form and check OFF the box titled “Use NCS values.”
If you encounter any issues with scale display values, please let us know at support@EganBIMResources.com.
Graphic Scales for Titleblocks
The app will also update a graphic scale placed within a Titleblock family. The app uses the Revit Built-In Sheet Scale parameter, which is only enabled if there is at least one view placed on a sheet and all views have the same scale. Note that Legends views have a scale that must match the main view to enable the Sheet Scale parameter. If both conditions are not met (no view placed or views with different scales), Revit automatically assigns "As Indicated" to the Sheet Scale parameter, and the Graphic Scale will not display.
Graphic Scales for Titleblocks follow these rules:
If the Sheet Scale on a sheet is a Metric Scale, only Metric Graphic Scale elements will display.
If the Sheet Scale on a sheet is an Imperial Scale, only Imperial Graphic Scale elements will display.
If the Sheet Scale on a sheet is not Metric or Imperial (no scale or "As Indicated"), no Graphic Scale elements will display.
To set up a Graphic Scale on your Titleblock:
To set up a Graphic Scale on your Titleblock, transfer an existing scale from the apps sample files and modify to suit. Use the Graphic Scale menu to "Open Sample Project - Titleblock" with either Imperial or Metric settings, as required. Select the Titleblock and select "Edit Family." This will be the "Source" Titleblock family. In the same session of Revit, open your desired "Target" Titleblock family.
Find the Graphic Scale elements in the Source family. For best results, copy ALL elements and paste into the Target family. This way, you will establish all parameters and visibility setting in the Target file. Modify the Target file as desired. If you place any new elements in the Target family, the elements must have their visibility controlled by the Yes/No parameters "ShowImperialScale" or "ShowMetricScale." Any element with an incorrect visibility setting will display at the wrong time in the project. Adjust as necessary.
When you are satisfied with the appearance of your Graphic Scale, select "Load Into Project" to load the revised Titleblock family into your project and verify its performance.
Network deployment
Please see the Network Deployment page for information on the network deployment features of Egan BIM Resources apps.
Screenshots
Installation and Uninstallation
The installer that ran when you downloaded this app has already installed the plug-in. You will need to restart Revit to activate the app.
To uninstall this app, exit Revit if you are currently running it and uninstall it from 'Control Panel\Programs\Programs and Features,' just as you would uninstall any other application from your system.
To uninstall this app, exit Revit if you are currently running it and uninstall it from 'Control Panel\Programs\Programs and Features,' just as you would uninstall any other application from your system.
Additional Information
This app adds a few invisible shared parameters into your project the first time you open your project with this app enabled. The app uses these parameters to store the graphic scale label information. You may add these shared parameters to your view title families or you may modify the sample families to suit your needs.
When you make the decision to use this app permanently, you can load the shared parameters into your template by opening and saving your template while the app is enabled. Then the app will not need to load the shared parameters into every new project.
This app is licensed by application, not by version. Your license will allow you to use any year’s version on your computer at any time, so the use of this app will not affect your Revit upgrade schedule.
If you need help developing a graphic scale to meet your needs, contact us.
Known Issues
This app responds to events in the Revit database, and must respond to all eligible events to remain up-to-date. Therefore, to get the most value from it, each computer working on a given project must have the app installed.
On workshared projects, when opening a project for the first time, the app may have difficulty adding the necessary shared parameters due to file permissions issues, which may appear as odd error messages like "Central File Unavailable." If this happens, make sure everyone else is out of the project, open the central file, save, exit and reopen your local file. The shared parameters should now be loaded and ready to use.
On workshared projects, when opening a project for the first time, the app may have difficulty adding the necessary shared parameters due to file permissions issues, which may appear as odd error messages like "Central File Unavailable." If this happens, make sure everyone else is out of the project, open the central file, save, exit and reopen your local file. The shared parameters should now be loaded and ready to use.


