Using Egan Room Area Tools Application
Once you install the app, it works in the background with very little need for input from the user. However, you may need to change some of the default settings, and customize the graphics to suit your company.
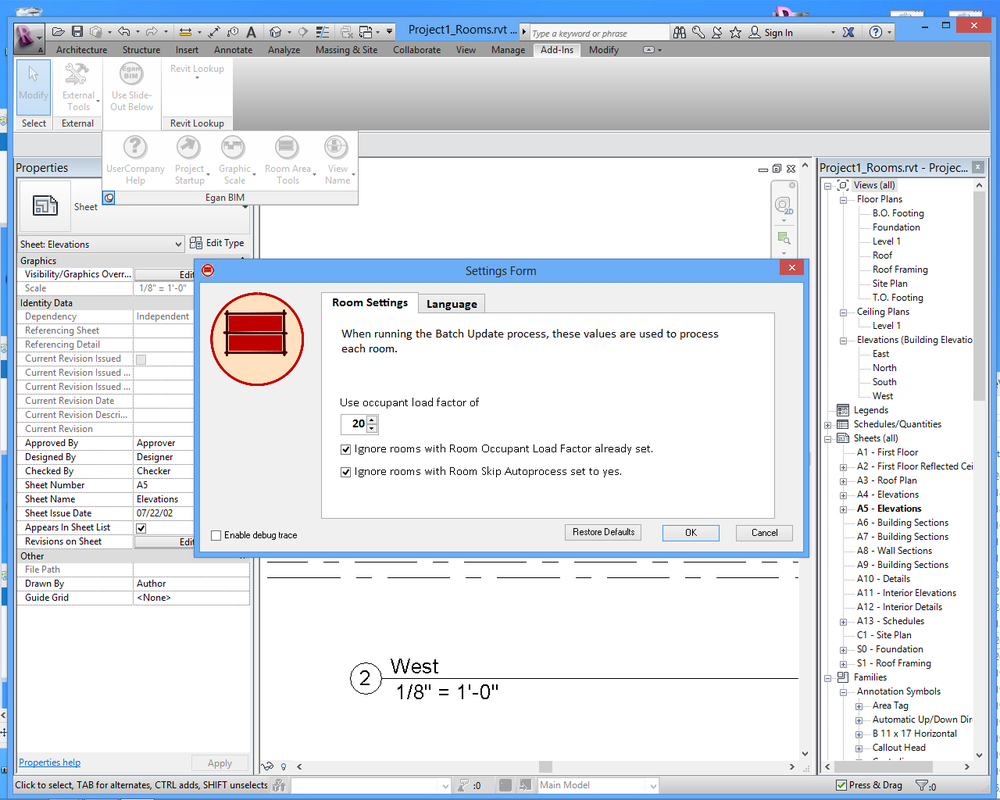
In Revit, go to the “Add-ins” tab > and the “Egan BIM Resources” panel. Select the slide-out menu at the bottom of the panel to display the “Room Area Tools” menu. Select “Room Settings” to display the Settings Form. The main setting is “Use occupant load factor of” with a default setting of 20 (SF per person). This is appropriate for Classroom occupancies in the United States, but you should select whatever number corresponds to your company’s most common occupancy. When the Occupant Load Batch Update runs, it will set all your rooms to this factor, plus all new rooms created in the future will be assigned this factor. If your Project Units are set to meters, occupant load factor will be in square meters.
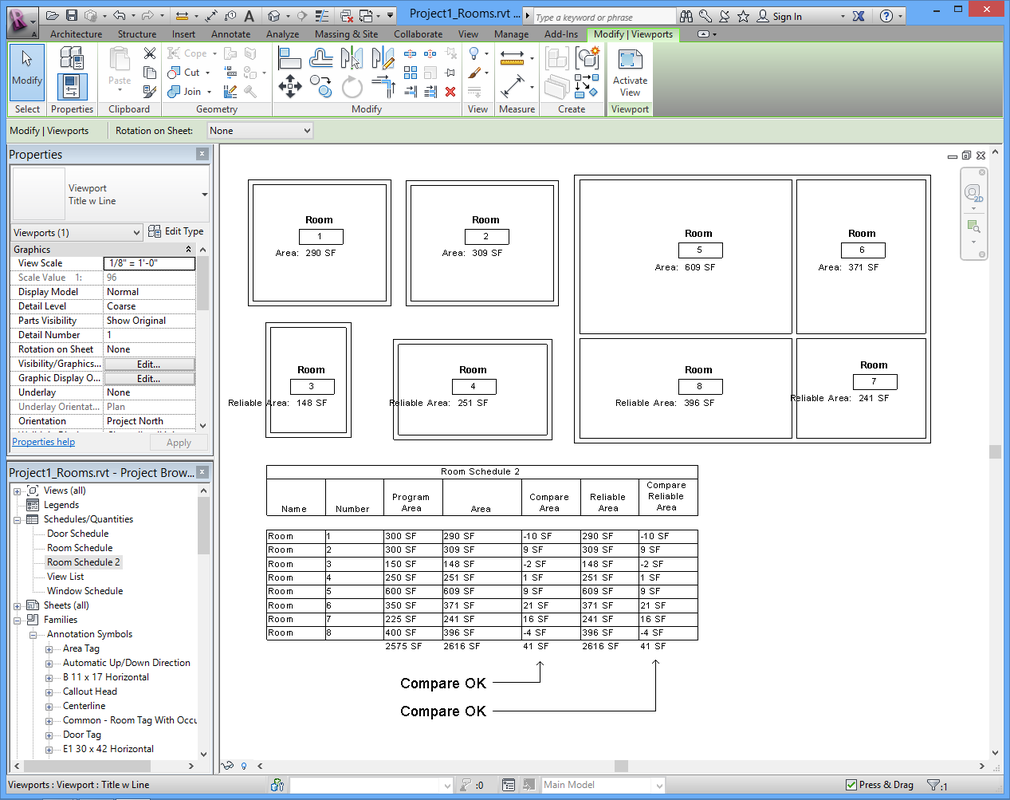
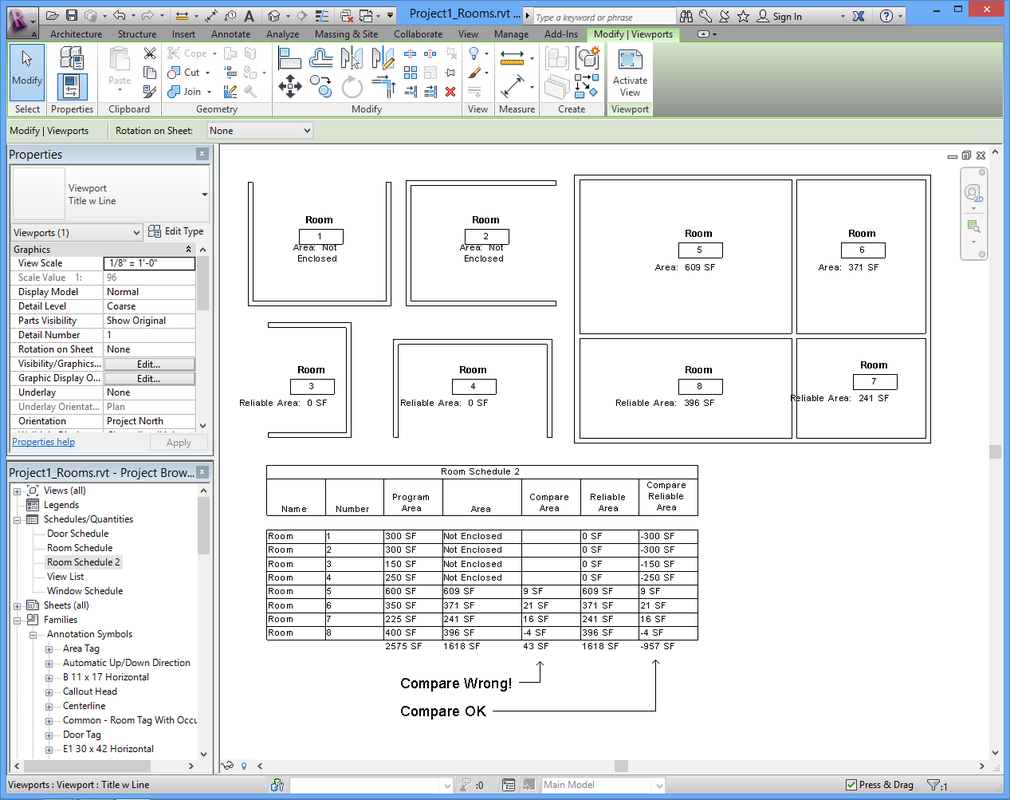
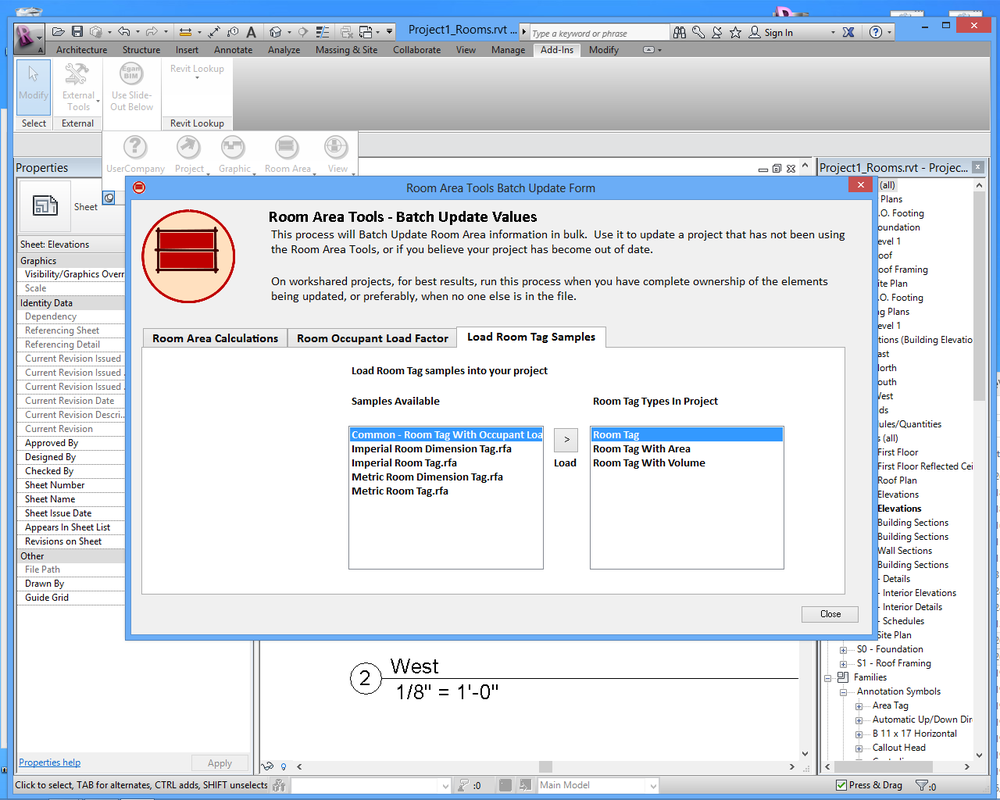
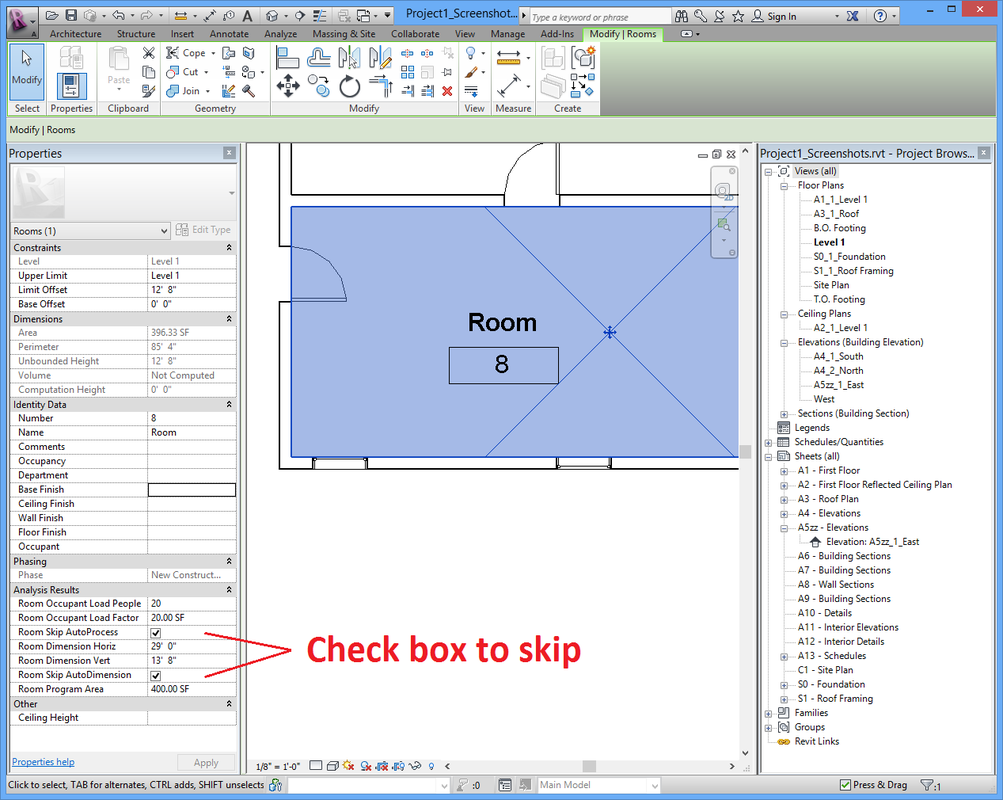
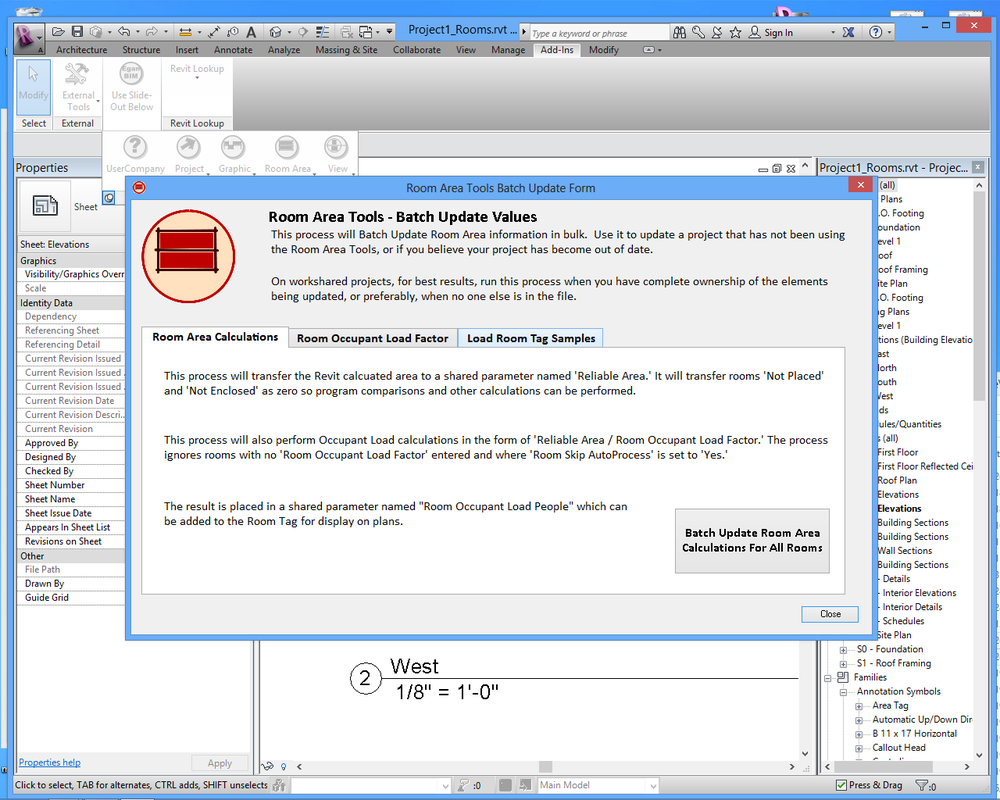
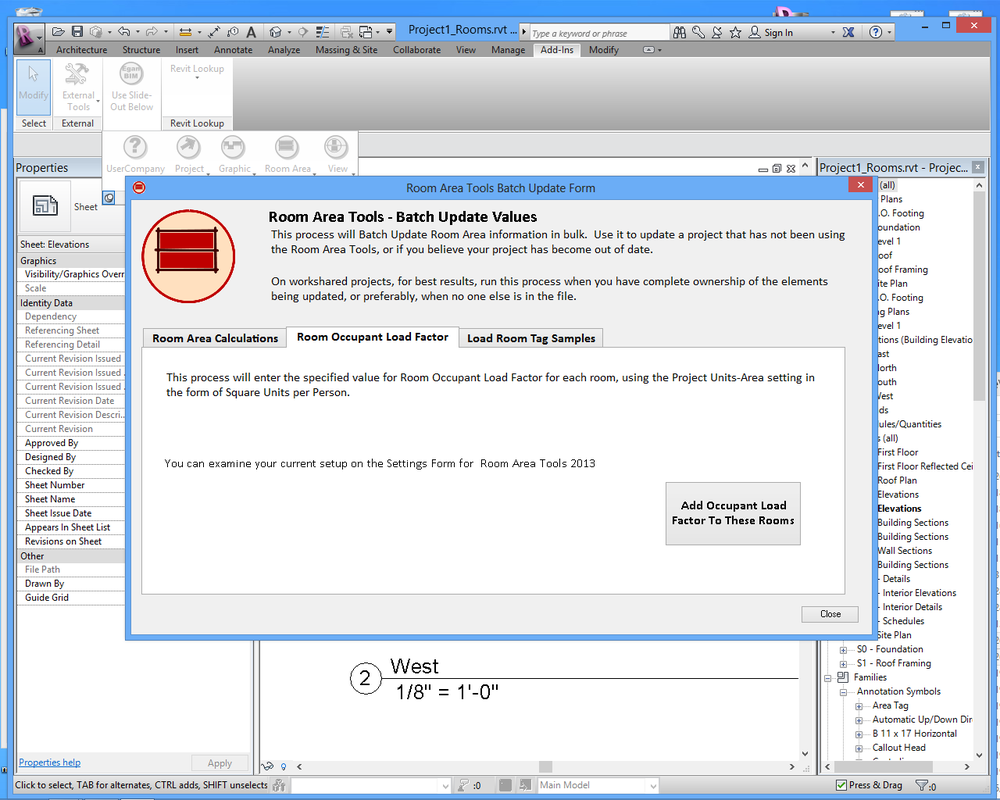
Once your default occupant load is set, select “Room Area Tools – Batch Update Values” from the menu. Pay attention to the notes about workshared files, element ownership and permissions. Click the “Room Occupant Load Factor” tab and then click the button “Add Occupant Load Factor To These Rooms.” That process will assign the default Occupant Load Factor to all rooms in your project. You can now go to the “Room Area Calculations” tab and run “Batch Update Room Area Calculations For All Rooms.” You will need to adjust the Occupant Load Factor for all rooms that need a different number, or click the “Room Skip AutoProcess” box for rooms (like assembly spaces) that have a fixed occupant load, and then you are done setting up your rooms.
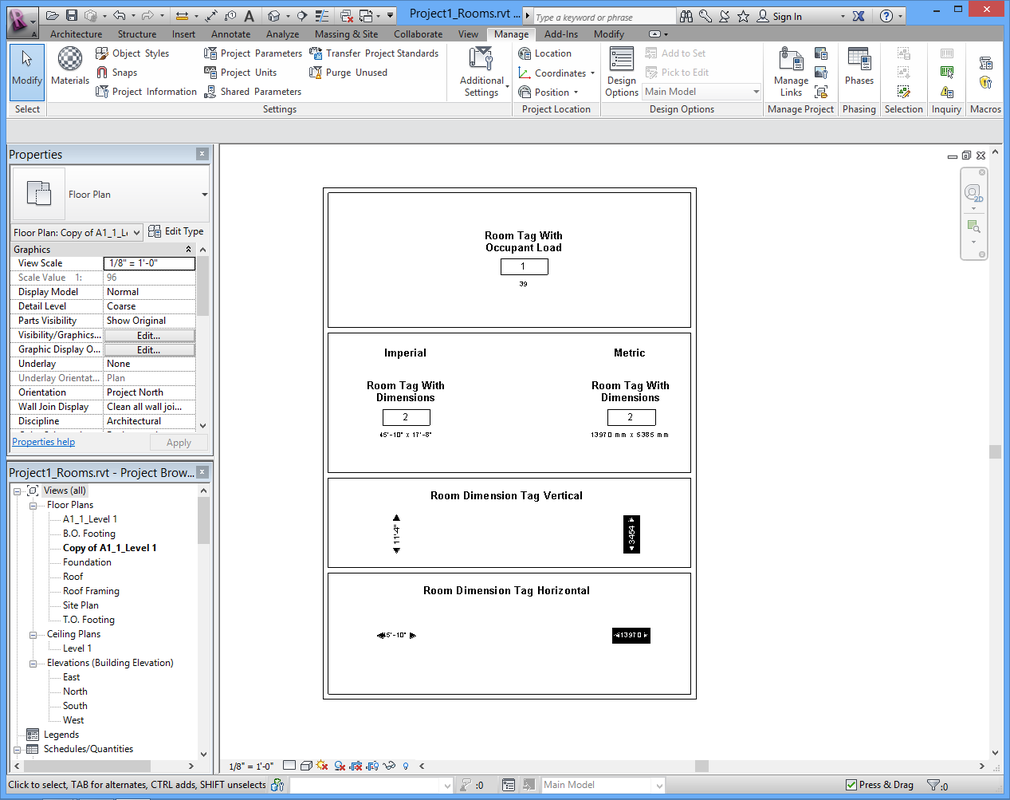
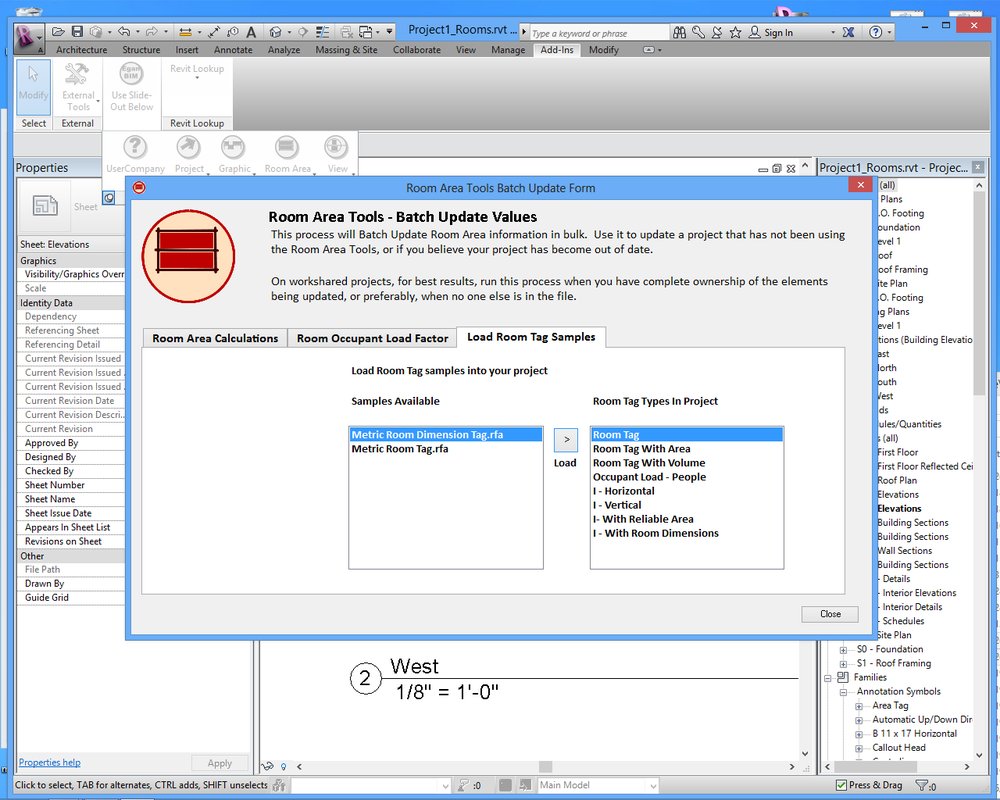
Still on the Batch Update Form, select the “Load Room / Area Tag Samples” tab. On the left is a display of samples available and on the right is a list of all the Room Tag Types already in your project. Use the “Load” button to load whichever samples you want into your project and see how they work. (Also see screenshot below for samples)
At this point you may to use the Revit family editor to modify the room and area tag families however you desire, or you can copy and paste the shared parameter text boxes from the samples into your already established families.
Network deployment
Please see the Network Deployment page for information on the network deployment features of Egan BIM Resources apps.
Screenshots
Installation and Uninstallation
The installer that ran when you downloaded this app has already installed the plug-in. You will need to restart Revit to activate the app.
To uninstall this app, exit Revit if you are currently running it and uninstall it from 'Control Panel\Programs\Programs and Features,' just as you would uninstall any other application from your system.
To uninstall this app, exit Revit if you are currently running it and uninstall it from 'Control Panel\Programs\Programs and Features,' just as you would uninstall any other application from your system.
Additional Information
This app adds a few shared parameters into your project the first time you open your project with this app enabled. The app uses these parameters to store the room information. You may add these shared parameters to your room tag families or you may modify the sample families to suit your needs.
When you make the decision to use this app permanently, you can load the shared parameters into your template by opening and saving your template while this app is enabled. Then the app will not need to load the shared parameters into every new project.
In addition, the app adds and deletes an area on project startup to initialize area processing. You may want to add at least one area to your Project Template so the starter area will not need to be loaded into every new project.
This app is licensed by application, not by version. Your license will allow you to use any year’s version on your computer at any time, so the use of this app will not affect your Revit upgrade schedule.
Known Issues
This app responds to events in the Revit database, and must respond to all eligible events to remain up-to-date. Therefore, to get the most value from it, each computer working on a given project must have the app installed.
To avoid Revit permission and ownership issues in a workshared project, this app regenerates room tags in the active view only. While you would only notice this issue if you have two views of the same room open side by side – for example, an overall view and an enlarged stair plan – be assured that the Revit database does contain the updated room information.
For room dimensions, circular and non-orthogonal rooms may give inconsistent results, but you can override the automated room dimensioning for any room.
On workshared projects, when opening a project for the first time, the app may have difficulty adding the necessary shared parameters due to file permissions issues, which may appear as odd error messages like "Central File Unavailable." If this happens, make sure everyone else is out of the project, open the central file, save, exit and reopen your local file. The shared parameters should now be loaded and ready to use.
