Using Egan Project Startup Application
Once you install the app, it works in the background with very little need for input from the user. However, you will need to change some of the default settings to suit your company.
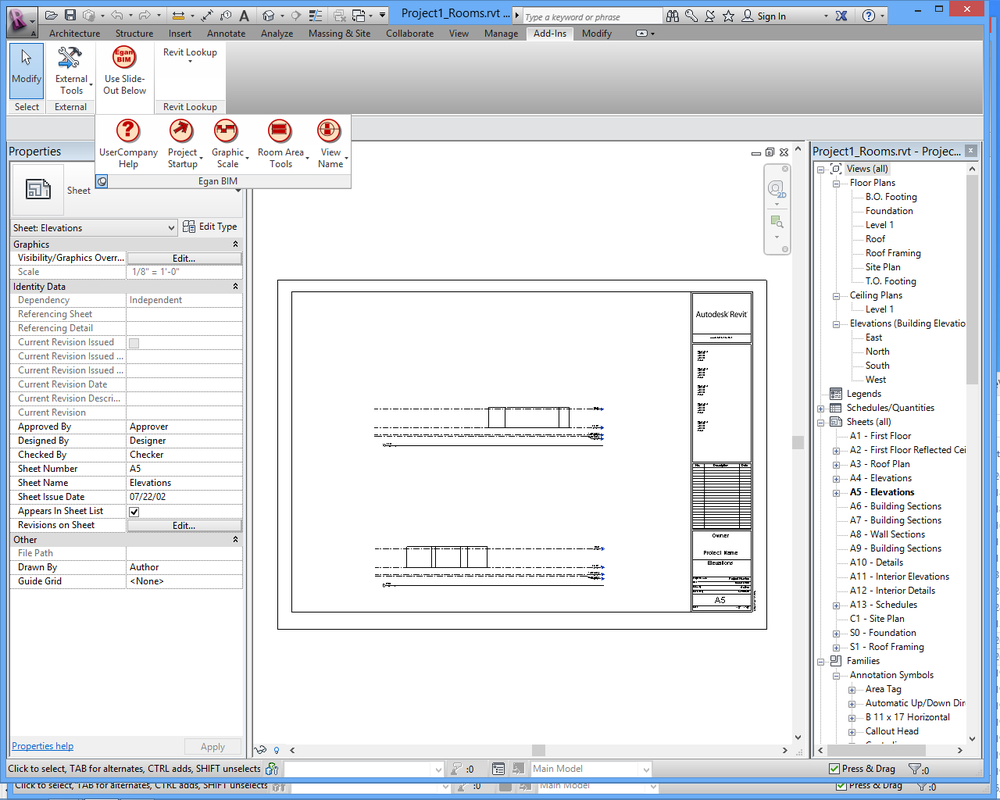
In Revit, go to the “Add-ins” tab > and the “Egan BIM Resources” panel. Select the slide-out menu at the bottom of the panel
to display the “Project Startup” menu. Select “Project Startup Settings” to display the Settings Form.
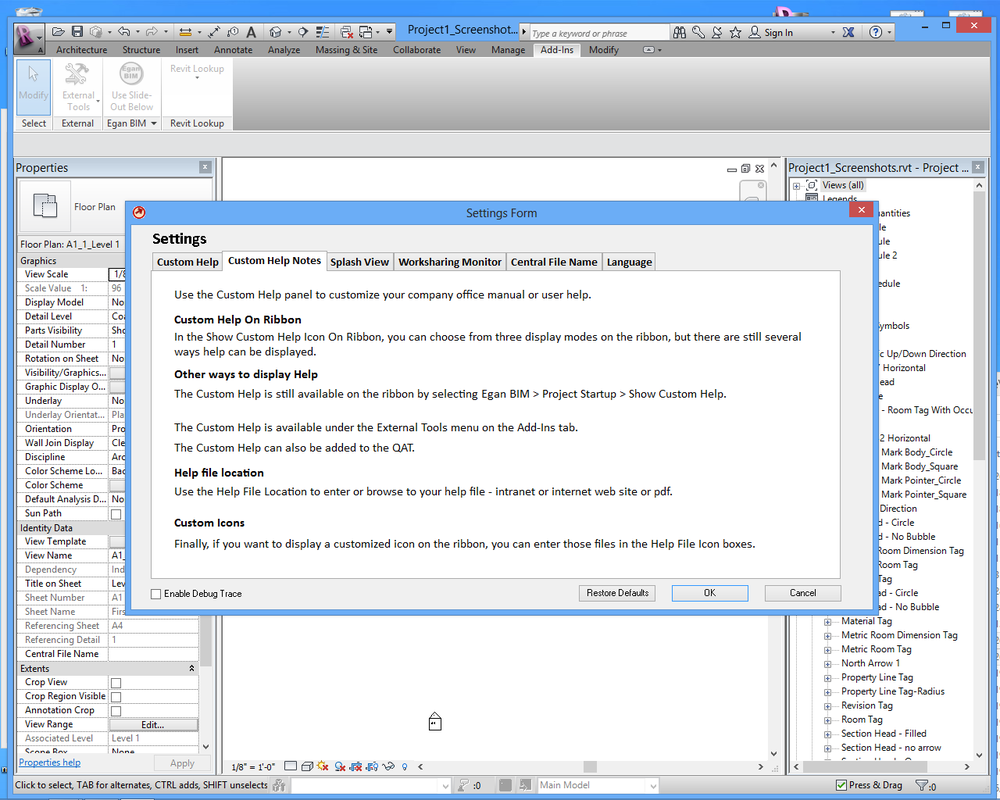
Following is a brief description of the settings on the Settings Form:
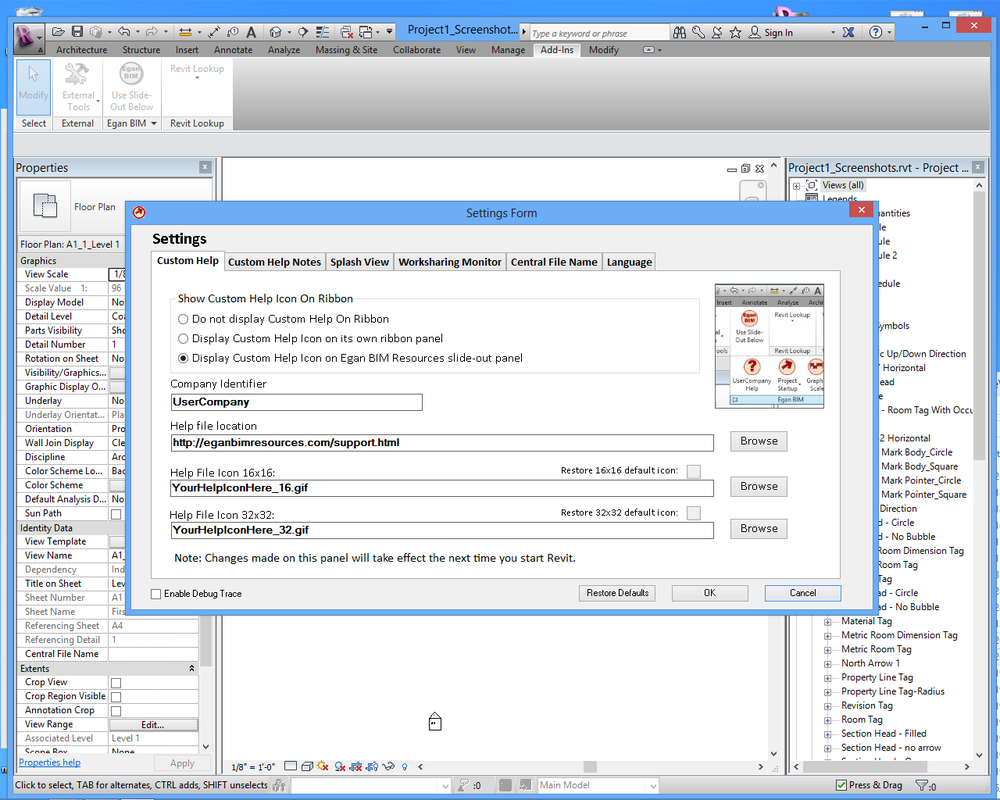
Show Custom Help On Ribbon <> Check the box that corresponds to the location where you want to display your custom help icon. Note that the middle button will allow the command to be added to the QAT. All locations will allow the command to be added to a keyboard shortcut.
Company Identifier <> Enter the name of your company.
Help File Location <> Enter or browse to the file that is displayed when you custom help is called. Can be any executable, web address or displayable file type (like pdf or doc.)
Help File Icons <> Default icons display a red question mark. To display a custom icon, browse to the location. Note that for best results, the icons should be the size indicated.
Alternate local file folder location <> The local file location defaults to the Windows User Profile. Enter an alternate local file folder location as required.
Suppress Previous Version Dialog <> Click here to suppress dialog if desired.
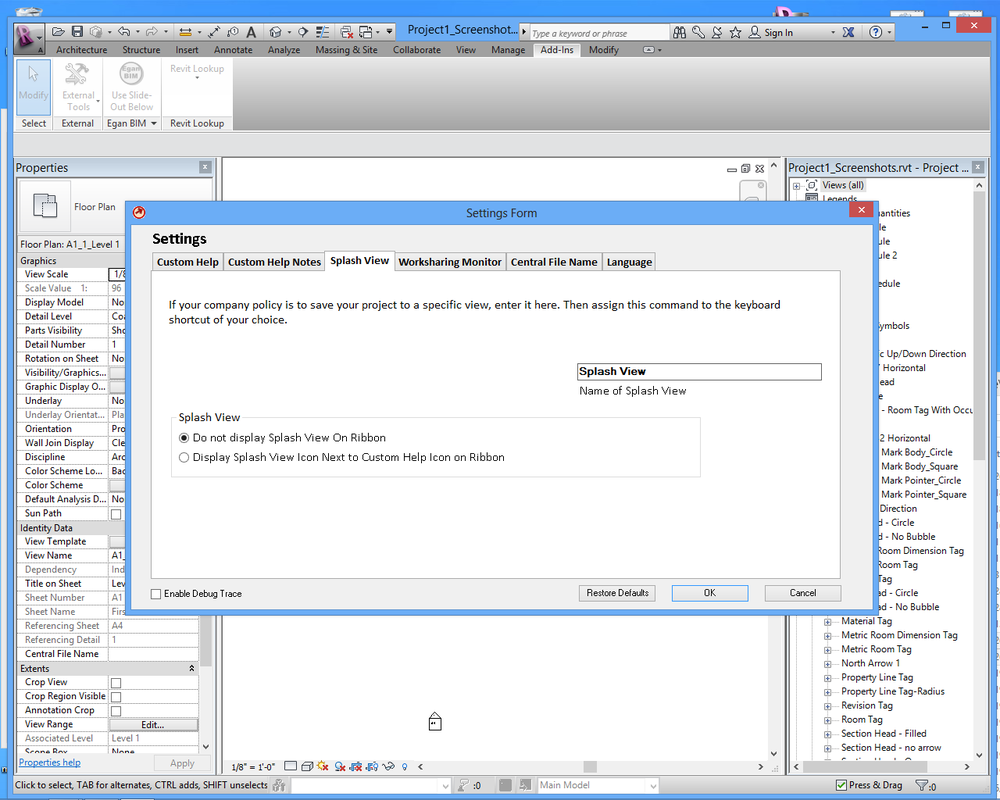
Splash View Location <> Choose the location for your Splash View Icon. Note that if it is on the main panel, the command can be added to the QAT. All locations will allow the command to be added to a keyboard shortcut.
Splash View Name <> Enter the name of your splash view. When the command is called, it will search for a view with
this name and display it. If it can’t find a matching view it will do nothing. This command can also be used to display your favorite view.
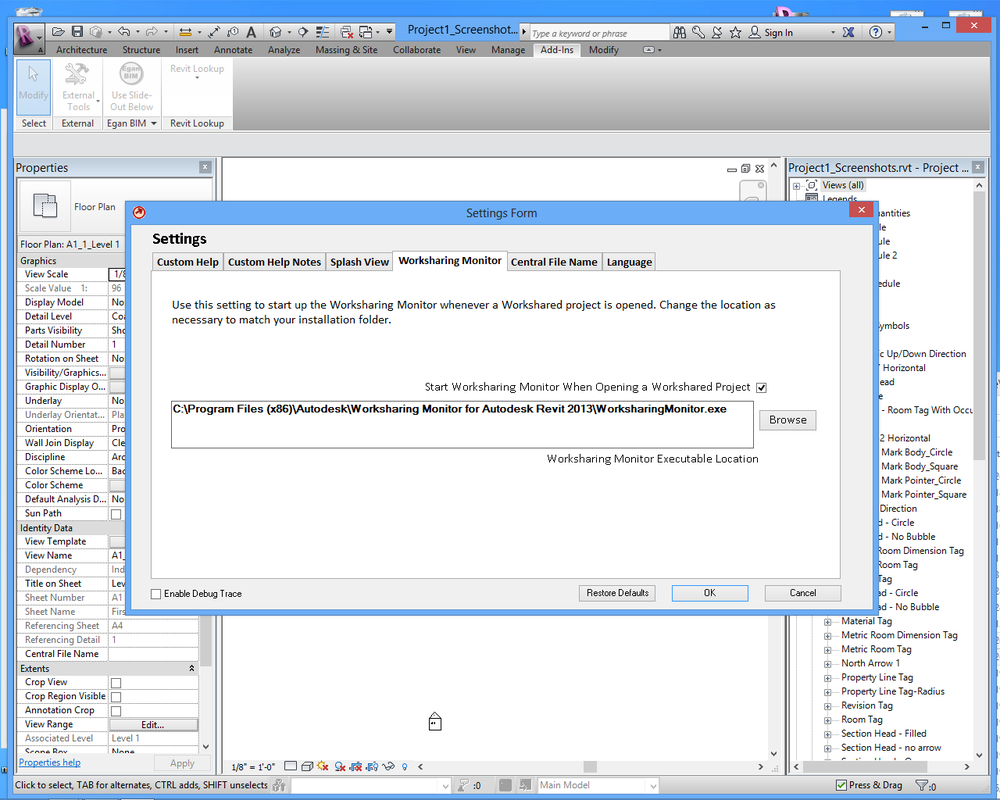
Worksharing Monitor Executable Location <> The default setting is where the Worksharing Monitor installs itself, but you may need to adjust it.
Start Worksharing Monitor <> Uncheck this box if you do not want the Worksharing Monitor to be started automatically.
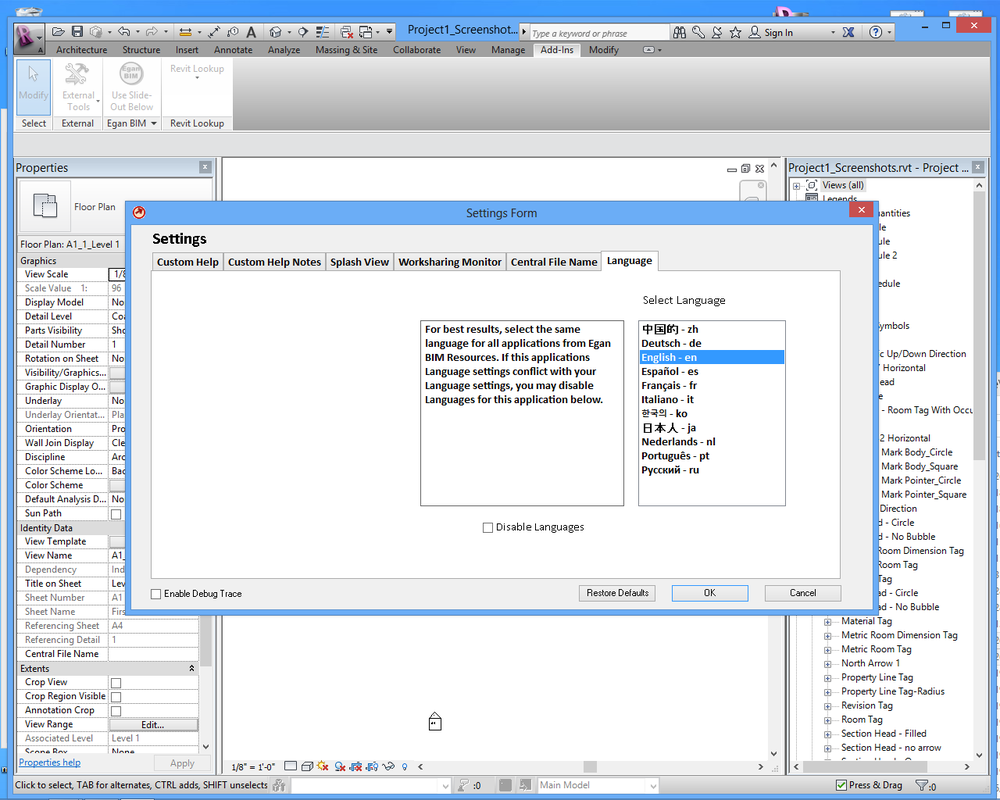
Language <> Select your preferred language.
Network deployment
Please see the Network Deployment page for information on the network deployment features of Egan BIM Resources apps.
Screenshots
Installation and Uninstallation
The installer that ran when you downloaded this app has already installed the plug-in. You will need to restart Revit to activate the app.
To uninstall this app, exit Revit if you are currently running it and uninstall it from 'Control Panel\Programs\Programs and Features,' just as you would uninstall any other application from your system.
To uninstall this app, exit Revit if you are currently running it and uninstall it from 'Control Panel\Programs\Programs and Features,' just as you would uninstall any other application from your system.
Additional Information
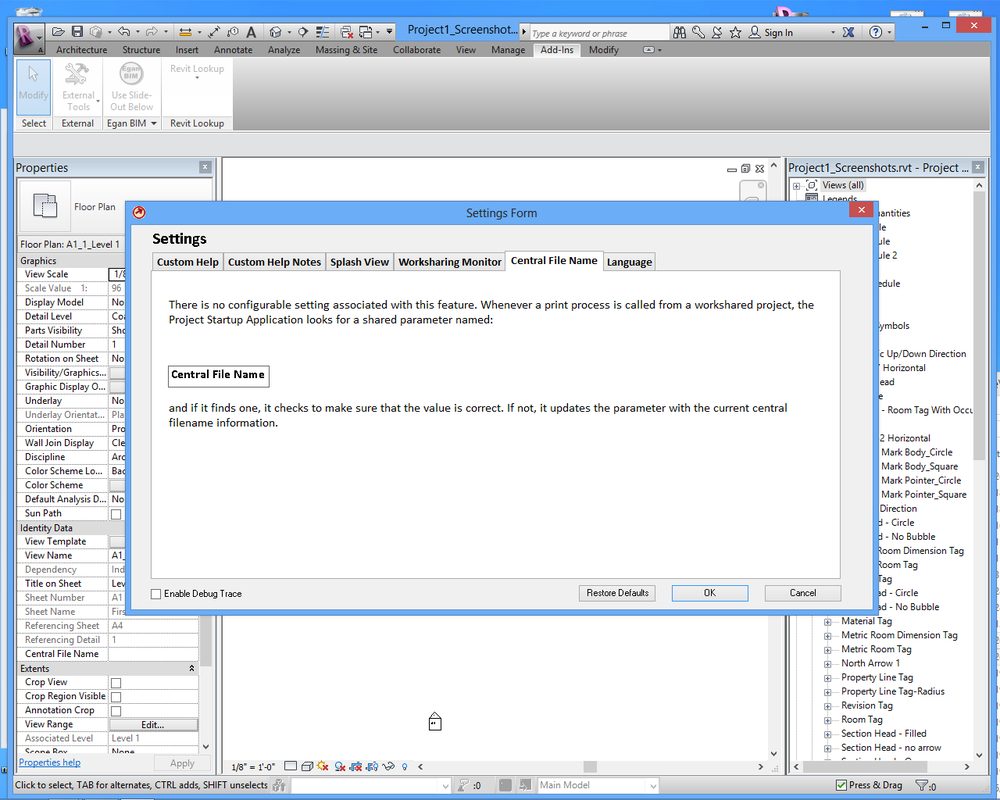
This app adds a shared parameter named “Central File Name” to your project the first time you open your project with this app enabled. You may add this shared parameter to your titleblock family or you may use your own parameter.
When you make the decision to use this app permanently, you can load the shared parameter into your template by opening and saving your template while the app is enabled. Then the app will not need to load the shared parameters into every new project.
If your company would like to establish default settings different from the apps default settings, contact us.
Known Issues
On workshared projects, when opening a project for the first time, the app may have difficulty adding the necessary shared parameter due to file permissions issues, which may appear as odd error messages like "Central File Unavailable." If this happens, make sure everyone else is out of the project, open the central file, save, exit and reopen your local file. The shared parameters should now be loaded and ready to use.
